Finally, we're giving you a tour of the inside of the Willow Grove In-Law Suite addition! In this fourth installment, Eric Tilghman shows us the completed porch, new entrance, interior rooms, universal design features, and discusses the next steps in construction.
Watch all the VLOGs from this project!
Willow Grove In-Law Suite Addition Part 1
Willow Grove In-Law Suite Addition Part 2
Willow Grove In-Law Suite Addition Part 3
Willow Grove In-Law Suite Addition Part 4
Willow Grove In-Law Suite Addition Part 5
No audio? Follow along here:
Hey guys! How're you doing?
Welcome back to the Willow Grove job.
I'm here by myself so we're sort of doing this a different way than we normally do, but we're gonna get through it.
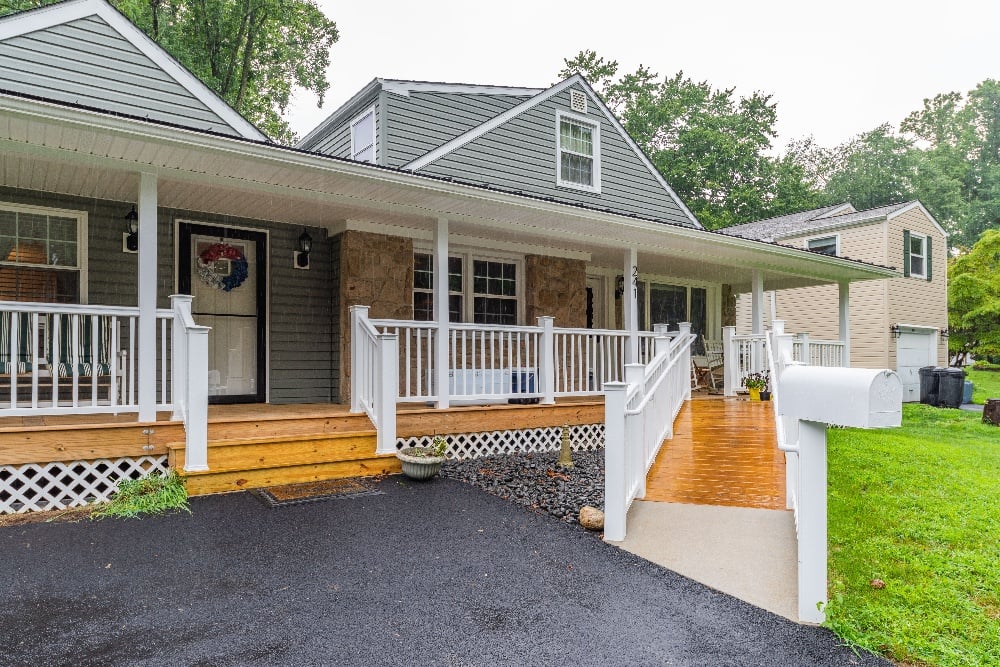
So I want to give you a full tour. We'll start with the outside here. We've got all of the siding done. The sun glare is pretty bad right now so I don't know if you can see the standing seam roof. It's over top of the front porch, going all the way across.
You can see the timber tech radiance rails - those are the white composite railings.
This is the ramp that we're working on and here are some temporary steps. Over here we're gonna have some concrete that comes down to the driveway. Remember, the driveway is getting widened - I'm walking up the imaginary driveway right now. This ramp will go away and there will be a set of steps with the rails coming down both sides.
As you know we have to finish the decking here and then bring the railings down - and here we are on the front porch! It's nice and long and awesome. We're really loving this front porch!
This is the in-law suite door and then just on the other side here is the kids'. It's pretty cool.
I also want to show you these scribes here. They are pretty sweet with this cool little carpentry technique where you go in and out of the undulations in the stone and makes a cool look.
Let's go inside! Okay, in the living room we've got a sofa here, sofa here and television over the fireplace. I built that fireplace this week with the blue stone and customized the all the woodwork around that.
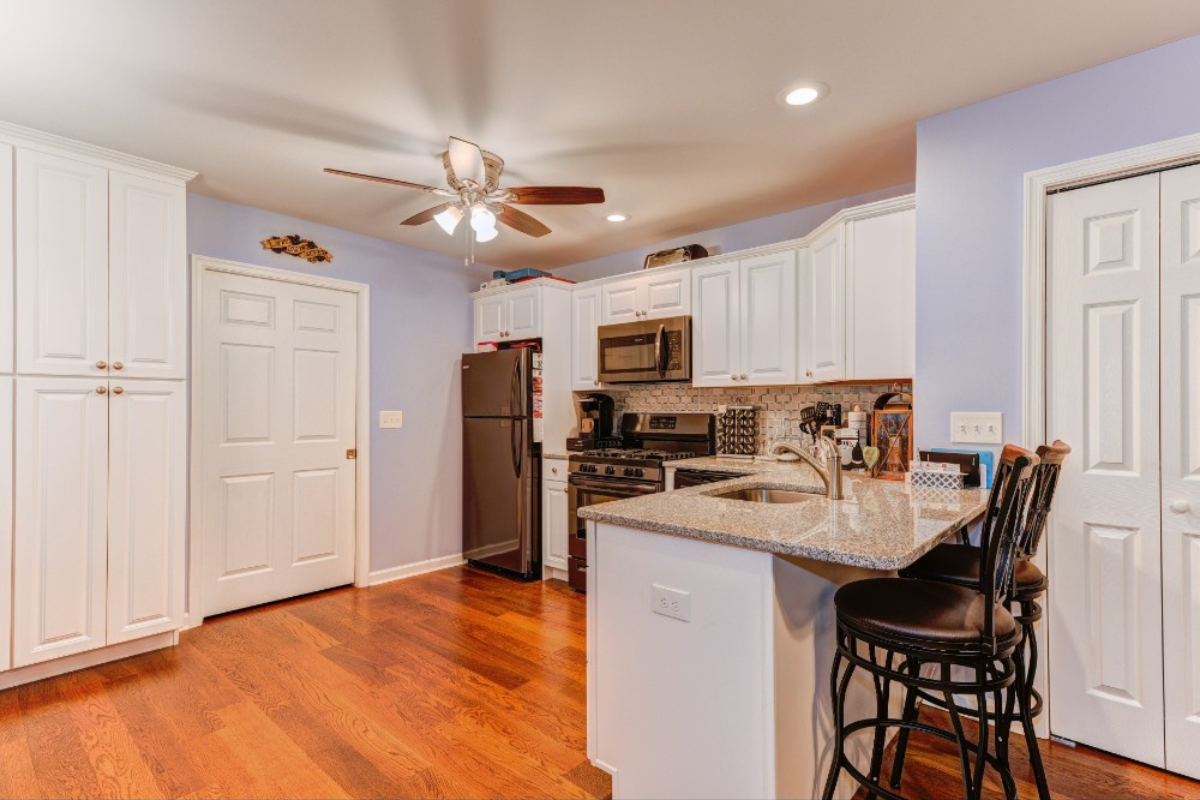
Over there, just in front of my saws will be the dining table - and on the wall behind my saws will be floor to ceiling cabinetry pantries. Then over here will be the rest of the pantry. The refrigerator will be on the left and then the stove in the middle and then some more cabinets. Then come out and turn and be a peninsula and there will be two breakfast stools right here and here to eat. The sink will be mounted on that peninsula.
Over here we have a little coat closet. And lots of pocket doors! Here's a shot the other way of the door that's a pass-through over to the kids' side of the house.
Then this is the bedroom. That door there - that goes to the back deck. It's not very big - about 4 x 8 feet.
This is where the washer and dryer will be - louver door to cover that. And this is the bathroom. So we'll have a vanity in there with a little linen closet. When you turn the corner here, there's the awesome shower! It's really great! There's no curb that way we can roll the wheelchair right in there. And it has a linear drain that gives a nice clean look.
Alright heading back out - I'll give you a good shot of the floor. We've got that covered up with some cardboard for now.
In here, there's a big walk-in closet with another pocket door.
And now we're outside! Back deck - AC unit - and then here's a good shot of the standing seam roof that goes up and over and connects to the front. So anyway, thanks for staying tuned guys this is an interesting video! I'll see you in a week or two. We're supposed to be out of here February 9th so hopefully I'll see you on February 9th! Everybody have a great weekend! See ya!